Holy Order Sol is an alternate version of Sol Badguy that represents Sol during his time in the Sacred Order of the Holy Knights. His fighting style is built around rushdown, charge management, frame traps, mix-ups, and powerful level-based special moves rather than the modern Sol’s sword-centered gameplay.
Holy Order Sol is a rushdown that focuses on quick and safe attacks to open up your opponents defenses. In general, you want to make your opponent scared of you. Make them afraid of pressing buttons by frame trapping them and doing mixups to open them up if they are playing defensively.
Who Is Holy Order Sol?
Holy Order-Sol is an alternate version of Sol Badguy, which has him clothed in a garment similar to that worn by Ky Kiske. Sol was indeed a part of the Sacred Order of the Holy Knights, this is a take on what Sol looked like during that time and how he fought before beginning to use his now-trademark sword, Fireseal (or "Fuuenken").
This form also shows a glimpse of Sol's true Gear form, where he sports a pair of demonic wings and a tail, when performing the original version, without the aid of Fuuenken, of his Overdrive move, Dragon Install.
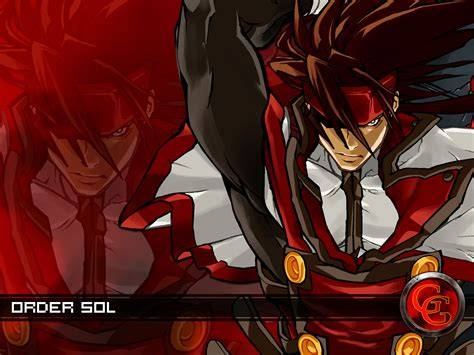
Sol Badguy was, no doubt, a badass hero for the Guilty Gear series. Truth be told, when a fighting game hero is so badass, there's only one thing to do: give him a badass "alternate" version in a later sequel!
Usually you'll see an "evil" version of the hero in later games, but in this case, since Sol was a "bad guy," Arc System Works had to give him a "good guy" alternate version! Clever stuff. To sum up Holy Order Sol, he's got an awesome moveset and is just as cool as the original Sol.
Notation
First off, to represent what motion to input, we use the numpad notation. For example: QCF (Quarter Circle Forward) would be 236. 2 is down, 3 is down-forward and 6 is forward.
Secondly, attack buttons are represented by itself: P K S H D. We use H instead of HS to not be confuse when doing chain combos involving S.
Core Mechanics
Charge
In addition to the standard tension meter, the Charge meter is unique to Order-Sol. It is callback to the first Guilty Gear mechanics.
Charge is integral to Order-Sol as it makes his special moves better. Good resource management is key to keep up pressure and breaking defenses.
There are two ways to charge: 214D to manually charge, and pressing D after a special move. The more charge you store, the more levels it gives, up to 3 levels.
| Action | Input or condition | Purpose |
|---|---|---|
| Manual Charge | 214D | Builds Charge and improves pressure. |
| Action Charge | Press D after a special move | Recovers some Charge and enables follow-up pressure or combos. |
| Maximum Charge level | Up to 3 levels | Unlocks stronger versions of special moves and Overdrives. |
Throw
His throw is more hard hitting than Sol's. Knocks down your opponent faraway or wallsticks when close to a corner.
Prorates very hard at 40%. Air throw is the same as Sol's. Another integral part of Order-Sol's gameplan.
Jumping
Another unique mechanic for Order-Sol is his jump height. His jump is shorter than most other characters making jump-ins more dangerous and air throws easier.
Normals
While Order-Sol shares many normals with present Sol, their properties changed to make them a bit different to play than Sol.
Standing Normals
5P
Fast and short. Has better frame advantage then Sol's. Great for starting pressure.
5K
Fastest normal in the west. While it is similar to Sol's, it only hits once and and has a smaller hitbox.
It is neutral on block so you can link another 5K to catch your opponents pressing buttons.
c.S
c.S is a strong starter, punish and combo tool. It is fast and sometimes an anti-air.
f.S
Much slower than Sol's. It is Order-Sol's farthest reaching poke but extends out your hurtbox and has less options to cancel to. Use it wisely.
5H
Unusual move but a welcoming one. Catches backjumpers and it is slightly safe on block.
Order-Sol takes a huge step forward when using this move so it can be punished if used haphazardly.
Command Normals
6P
Flashier but slower? Unlike the other 6Ps, Order-Sol's is unique as it is slow to come out.
This makes it a bad anti-air option as deep jump-ins can beat it. It is, however, great for blockstrings.
You can use it as a frame trap tool due to it's longer startup. It is also counted as a projectile so you can cancel out fireballs. Staggers when hit.
6K
Throw invincible until active. Lots of active frames. A great tool to catch wake up throw attempts and pushes them away.
Staggers on counter hit.
6H
70 damage is nothing to be scoffed at. Deals a lot of stun and stagger on hit and a hard knockdown on air hit.
Other than that, it has limited uses and you can only cancel it with Roman Cancel.
5D
Average overhead. Not super but not terrible, just a standard Dust.
Crouching Normals
2P
Same as 5P but only a slight advantage on block.
2K
Your low poke of choice. Quick low and neutral on block.
2S
Actually faster than Sol's. Makes Order-Sol a little bit more smaller.
2H
The only crouching overhead normal in the game. Slow but neutral on block. Launches opponent on counter hit.
2D
Same as Sol's but it is shorter and moves Order-Sol forwards slightly. Extremely low profile, going under almost every attacks.
Air Normals
j.P
Best air tool. Fast and self-cancelable. Shrinks his hurtbox to sneak past some anti-airs.
j.K
Reaches higher opponents. Combo filler.
j.S
Good tool to go with j.K. Also jump-ins and okis pretty well.
j.H
Your jump-in of choice. Strong and can convert on hit.
Counter hit grants ground slide for strong conversions.
j.D
Disjointed and paired with j.H for Dustloops in the corner. Counter hit launches and wall bounces near corner for conversions.
Also another oki tool.
Special Moves, Force Breaks and Overdrives
Now the meat of Order-Sol, specials and supers. Every special moves and Overdrives has three variants depending on your charge level except for Force Breaks, Manual Charge, Action Charge and Charge Burst.
Manual Charge
Manual Charge - 214D
THE most important tool in Order-Sol's kit. Helps in pressure and building Charge.
Hold down D to continue charging. Tap D after a special cancellable normal to Charge Cancel to grant better frame advantage for pressure or convert a counter hit 2D to big damage combos.
Action Charge
Action Charge [AC] - After a special move ~ D - Air OK
Cashes back some charge but will stop your momentum. There is a late FRC point after Order-Sol cashes back for better frame advantage or continue the combo with charge and faster followups.
Charge Burst
Charge Burst - Manual Charge ~ HS
Situational but mostly useless. Can be baited easily and your are in counter hit state in recovery.
Blockhead Buster
Blockhead Buster [BHB] - 236P
Close ranged flame bursts. Staggers on hit from all 3 bursts.
Level 1
Small burst. Not really useful but not useless. Staggers on hit and gains more frame advantage when AC FRC'ed.
Usually used for quick Action Charge to build Charge or as a combo tool.
Level 2
Large burst. Significantly more useful than level 1.
More frame advantage than AC FRC level 1 and even more when AC FRC'ed. Blows back opponents on hit and wall stick near corner, important combo tool for corner air combos.
Level 3
3 times of level 2. Gives you the most frame advantage even without AC FRC.
Locks your opponent from pressing buttons and obscures their vision to see what you are doing. Staggers on hit from all 3 bursts.
Floats airborne opponents low enough to convert. Does not blow back.
Bandit Revolver Prototype
Bandit Revolver Prototype [BRP] - 236K - Air OK
Quick evading lows and overhead. All versions have a FRC point just before Order-Sol reaches the peak of BRP for a safer air option or throw.
Level 1
Quick overhead at -1 frame, not really useful if not spaced correctly. Invincible to lows from Frame 1.
Level 2
Better than level 1. Quicker and ground slides opponent on second hit.
Second hit is also unblockable if not air FD'd. Staple combo tool in the corner.
Level 3
Your go to midscreen combo starter. The fastest and the most rewarding.
If you want big damage from midscreen, start from this. Same properties as level 2 but launches, blows back and wall bounce your opponent.
Rock It
Rock It [RI] - 236S
Pressure ender and restarter. It is jump cancellable when the third hit connects.
Level 1
Moves Order-Sol across the stage. Essential advancing move. Starts pressure when close enough to your opponent.
Can be low profiled so be careful. Ground slides on counter hit for conversions.
Level 2
A followup knockdown. Second hit confirms knockdowns from afar. Gains better frame advantage than level 1.
Level 3
Another followup for air conversion. Third hit launches for a full combo.
While it has frame disadvantage by itself, it can be negated by jump cancelling.
Gunblaze
Gunblaze [GB] - 214S
Unusual, low profile, pass through move that has its uses. Creates flame pillars behind.
Level 1
Slides Order-Sol through a short distance and leaves a flame pillar behind. Uses for crossups, okizeme and an occasional anti-air.
You can be thrown out at any point so don't use it predictably. Has a FRC point. Counter hit makes it untechable.
Level 2
Slides further and faster while dropping another flame pillar. Now has vacuum effect to combo.
Can loop itself if you have enough charge.
Level 3
Faster startup and drops 3 flame pillars. Same properties as Level 2.
Loops itself until level 1, making big damage.
Storm Viper
Storm Viper [SV] - 623H - Air OK
Order Sol's DP, not the best but not useless.
Level 1
Janky. Slow for a DP so fast meaty can outright block it. Startup is fully invincible.
AC FRCing this moves makes him safe if the opponent does not expect it. Mostly unsafe if blocked.
Level 2
Faster a bit than level 1. Third hit knocks opponents farther away and has more untechable time.
Even more unsafe.
Level 3
Expensive but useful. Fastest DP in Order-Sol's kit.
Fourth hit removes OTG and ground bounces for combos. Somewhat safe at -3 frames.
Can be stuffed out before the fourth hit.
Force Break
Fafnir - 41236D
His only Force Break. A half screen long range low attack that floats opponents on hit.
Counter hit floats even higher for bigger combos. Also great for scaring if used properly.
Overdrives
Savage Fang
Savage Fang - 632146P
Dragon Install Gunflame but uses meter.
Level 1
Same properties as Sol's. Subpar and not really useful.
Level 2
Much better properties, hits 3 times. After the super freeze, immediately goes active making any dashing a guaranteed hit.
Level 3
Fill it with fire. Removes OTG and launches for conversions.
Hits are distance dependent to a maximum of 5.
Tyrant Rave ver. Omega
Tyrant Rave ver. Omega - 632146H
Level 1
Subpar. Mediocre damage for a super and knockdown. Long startup but it is fully invincible.
Level 2
Better than level 1. More invincibility frames but still the same.
Wall bounces for a short air combo.
Level 3
Far more damage for more resource. The biggest boom.
Has the most invincibility frames to blow through anything. Pushes opponent farther away when blocked making it somewhat safe.
Dragon Install Sakkai
Dragon Install Sakkai - 632146S ~ P, K, S, HS, D, K, S, 632146H
Go big or go home. All in. Uses Level 3 Charge, 100% Tension.
When done raw, it deals a lot of damage only if you pull of this Deadly Rave nod combination.
If you got blocked, mistime or drop the combo midway, you will be in a vulnerable state for almost a second. Removes OTG on the second hit so it can work out of sweeps.
After reaching a certain amount of life, this will instant kill.
GGST ▰ Tatuma (#2 Ranked Sol) vs Sanakan (#2 Ranked Chaos). High Level Gameplay
Gameplan and Neutral
Order-Sol's gameplan revolves around getting close, forcing the opponent to respect his pressure, and spending Charge at the right moment. His shorter jump makes jump-ins more dangerous and air throws easier, while his strongest pressure sequences come from Charge Cancels, BHB, RI, BRP, and low-overhead threats.
Neutral Tools
2S and f.S
Catches attack attempts. Your tools to poke your opponent pressing buttons.
5H
Anti-air callout. This will make them sit down if for trying for a jump-in or IAD attempt.
Pressure
Pressure Starter into 2D or 2S into 214D
Your most common pressure string. Get used to the range of 2D and 2S.
Tapping 214D will Charge Cancel your normals to make them safe. CCing 2D gives good frame advantage allowing you to dash in for another blockstring, mixup or frame trap.
CCing 2S resets back to neutral game if you're too far from 2D range.
BHB into Action Charge FRC
BHB gives you the least frame disadvantage and most frame advantage.
| Move | Normal result | After AC FRC |
|---|---|---|
| Level 1 BHB | -2 | +2-7 |
| Level 2 BHB | More frame advantage than AC FRC level 1 | +20 |
| Level 3 BHB | +37 | +23 |
Level 1 is -2 but with AC FRC, you can bring that to +2-7. Level 2 gives even more at +11 and +20 when AC FRC, allowing more options.
Level 3 is an absurd +37 but +23 when AC FRC. Not only it gives a lot of time for mixup options, it also obscures the characters on screen so your opponent may have trouble figuring out your mixup attempt.
Starter into RI
Easy pressure ender and restarter.
Level 1 is +3 so you can microdash 5K, frame trap or tick throw if you are close to the opponent.
Level 2 is the same but with +4, allowing a bit more time to get in or frame trap.
Level 3 introduces a mixup attempt as you can jump cancel the last hit to continue pressure from jump-in attacks or empty jump land and 2K or Throw mixup.
Starter into BRP
Catches low blockers. BRP can also evade any low moves when your opponent throws out.
Level 1 is -1 and can be thrown out of before you recover even on hit. Don't use this. Just don't.
Level 2 is almost the same as Level 1 but the followup is air unblockable without FD. So throw this out if they attempt to backjump without FD.
Level 3 is +5, allowing you to do blockstrings or frame trap them. Followup is also air unblockable without FD.
Mix-ups
Blockstring, dash 2K into 2H
Catches low blockers as they are not expecting an overhead after a low. Counter hit for a full combo.
Blockstring into Fafnir
Catches low poke attempts and high blockers.
Blockstring, dash 2K, Throw
Tick throw them out of block.
Defense
Order-Sol lacks in defense. If you're opponent starts pressure, you don't want them to keep at it. You'll have to use subpar tools to get out of it.
5K
A great interrupter for any dash in blockstring attempt or poke attempt.
Crossunder Anti-air c.S
Pretty good AA you can react to your opponent jump-in.
Air Throw, j.P and j.K
Great anti-air tools to combat jump in attempts. Air throws are all round great tools to turn the tide.
j.P is fast to come out and very active. j.K will beat out deep jump in attempts.
Storm Viper
Your DP, while janky, is still an option.
Level 1 is pretty slow but full invincible startup. You can AC FRC to mess up the punish timing of your opponent.
Level 2 is faster and gets you out of pressure by putting distance between you and the opponent.
Level 3 is the fastest and rewarding if you can hit as it ground bounces on fourth hit for a full combo.
Gunblaze
Another attempt on escaping corners. GB will catch normals that are higher than crouching and as another anti-air option.
Combos
Starters and Essential Combos
Your most barebones without using resources, don't forget them.
- 5K > c.S > 2D
- 5K > c.S > 2S > 2D
- c.S > 2S > 2D
- (5K/2K/c.S) > 5S > 5HS
5K > c.S > 2D is a short and simple special cancellable string. 5K > c.S > 2S > 2D is the farthest you can do while still retaining special cancellable.
c.S > 2S > 2D is a punish combo, deals more damage. (5K/2K/c.S) > 5S > 5HS is your farthest pushing combo, pushes opponent faraway.
It is great for instant airdash pressure resets.
Counter-Hit 6H Combo
[Counter Hit only] (f.S/2S) > 6H
Deals a good chunk damage. You can RC 6H for a followup combo.
Super Jump Instant Airdash Combo
High Jump IAD (2956) > j.x > j.S > SV
Important combo if 5H launches too high for a normal IAD combo. j.x is a combo filler, usually j.P or j.K.
Dustloop
[When opponent is in the air or wall stick] . > dash j.HS > j.D > (delay) dj.HS > j.D
Important air combo, deals great damage. Lightweights would require more delay. Heavyweights would have less delay. Dash momentum is important.
Corner Throw into Dustloop
[In corner] Throw > (Dustloop/6HS)
Basic way to start dustlooping. You can add a BRP to knockdown if you have level 2 charge or air throw them if they try to tech back or neutral.
If you are a bit far away from the corner, go for 6HS for a hard knockdown.
Double Dustloop
As the name says, you connect two dustloops together. It is the most damaging combo that Order-Sol has in his tools.
Only doable when near or at corner, this will net you 200+ damage. To do the double Dustloop, you need to be low to ground.
A good indicator to see if you are low enough is camera doesn't pan up. Another condition is that your opponent is higher than you but still low enough to not tech.
First loop, the first jump cancel should be delayed to let you and your opponent fall lower to the ground. The 2nd j.D should be delayed to cancel your landing recovery faster and be able to jump again for the second loop.
Second loop, you have to do rising j.HS to catch your opponent. After that do it without any delays.
Level 1 Combos
- Starter > (RI/BHB/BRP)
- Starter 2D > GB > (GB/RI/6K)
Starter > (RI/BHB/BRP) is a universal combo with BHB and RI, techable. BRP only connects on lightweights.